 GERWERTZ TRAMMENER
....... What the hell is that ?
That's exactly what I said when I heard it for the first time when my best friend quickly read the box lid of my KIT [Trumpeter 17cm Kannone King Tiger Grille] and attempted to give it a name.
He is not a modeller.
It stuck after that, so as stupid as it sounds, I now call this a Gerwertz Trammener.


....................
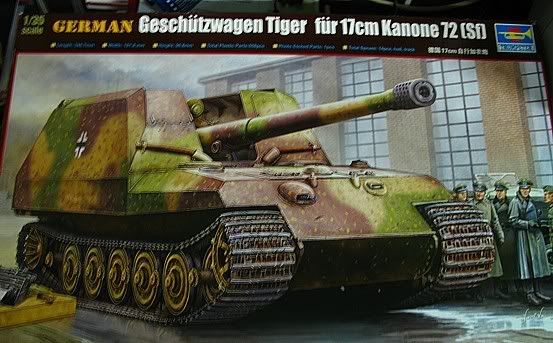 When I went out and purchased this kit it was always with the intention of building the unfinished Prototype found at Kruppe in 1945, by the Americans. I will be showing a series of photos from the Concord book - PANZERS IN THE GUNSIGHTS 2 as well as some others from a Japanese publication on experimental and one off German armoured vehicles.
 This is my detail reference.
The interesting part to doing a subject such as this is the photographic study of the details, as well as the possible colours. I will include my colour conclusions later but at this point I will just look at the photos and discuss the various engineering details of the vehicle.
.................
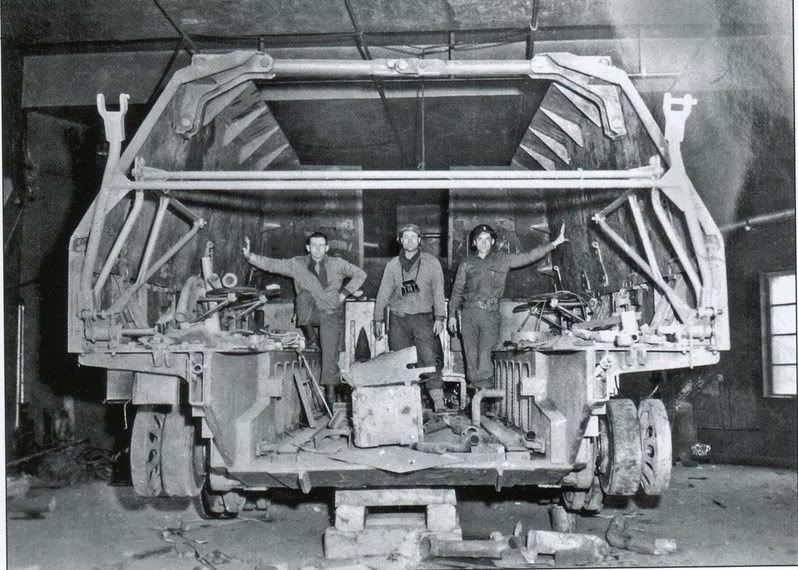 This is the shot that grabbed my interest intially due to the obvious size of the cabin but it also attracted me because of the amount of junk lying around and that it was in a building. Both of these factors appealed to my style of modelling, so it was a 'done deal'. The interesting physical properties of this photo are all about the original state of the Grille. Modelling this kind of set-up (for me)is a breath of fresh air from the 'A- typical' tank on base. I have had a great time anylising the photos and trying to extrapolate the detail. There are a number of hoses and such in the back of the vehicle which I am guessing come from the cooling system of the engine.
Q. There is also a large box in the middle in front of the soldiers which looks familiar but I am unsure as to what it is - any help indentifying this would be great, as at this point I am going to add it to my scene as a radiator assembly.
I know this is probably incorrect but it seems be a good detail fit just the same.
I am going to set my scene after the actual photo, so that I can adjust a number of things to add additional interest .
I have had to leave a few details out during the construction as they are missing on the vehicle, however i will also be adding the odd part if I think it will improve the overall effect. An example of this is the front sheild to the fighting compartment. I will be having the hinged hatch in the open postion. I have adjusted the torsion bars (which must be glued to the 'fully weighted position) to a fully 'unweighted' position as the vehicle is suspended above the ground on blocks and without the gun or cradle. I am still deciding on details surrounding the engine compartment as I am not sure of the state of the engine installed.
This is the shot that grabbed my interest intially due to the obvious size of the cabin but it also attracted me because of the amount of junk lying around and that it was in a building. Both of these factors appealed to my style of modelling, so it was a 'done deal'. The interesting physical properties of this photo are all about the original state of the Grille. Modelling this kind of set-up (for me)is a breath of fresh air from the 'A- typical' tank on base. I have had a great time anylising the photos and trying to extrapolate the detail. There are a number of hoses and such in the back of the vehicle which I am guessing come from the cooling system of the engine.
Q. There is also a large box in the middle in front of the soldiers which looks familiar but I am unsure as to what it is - any help indentifying this would be great, as at this point I am going to add it to my scene as a radiator assembly.
I know this is probably incorrect but it seems be a good detail fit just the same.
I am going to set my scene after the actual photo, so that I can adjust a number of things to add additional interest .
I have had to leave a few details out during the construction as they are missing on the vehicle, however i will also be adding the odd part if I think it will improve the overall effect. An example of this is the front sheild to the fighting compartment. I will be having the hinged hatch in the open postion. I have adjusted the torsion bars (which must be glued to the 'fully weighted position) to a fully 'unweighted' position as the vehicle is suspended above the ground on blocks and without the gun or cradle. I am still deciding on details surrounding the engine compartment as I am not sure of the state of the engine installed.
.............................
 There are a number of interesting details here sitting on top of the engine deck such as oil bath filter housings and pipes, as well as what looks like a battery and toolbox. I have modified the fan covers on mine to add detail (and make the modelling more exciting for myself) and I will go further into this later.
................
There are a number of interesting details here sitting on top of the engine deck such as oil bath filter housings and pipes, as well as what looks like a battery and toolbox. I have modified the fan covers on mine to add detail (and make the modelling more exciting for myself) and I will go further into this later.
................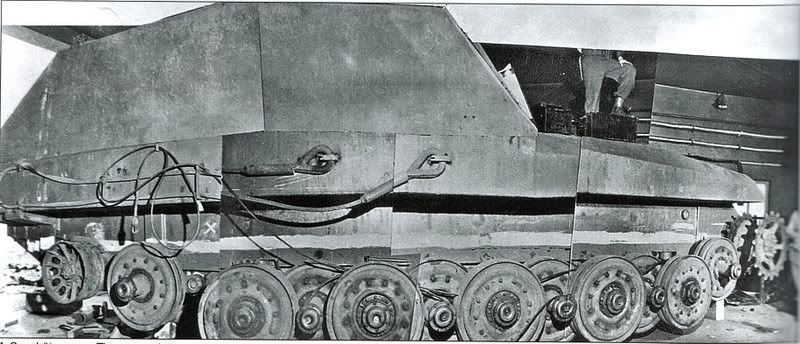 This is a view of the vehicles side, inside the shed where it was housed . The photograhy here is misleading, tone wise, as it is made up of a patchwork of smaller photos taken from a stationary spot. This has effected the light reflected off the vehicle so the most reliable tones would be directly in front or slightly right of the photographer (away from the direct light from the shed entrance). I won't deal with my guesses on color until later in the blogg, so please be patient with this aspect. These photos are the only shot showing the right side of the vehicle clearly (as found in it's original location). The tow cables and mounts are an interesting addition as well. There is another shot of this side from a distance, after the vehicle has been dismantled and moved onto a heavy duty transport trailer.
After an unknown period of time the vehicle was 'dragged' out of the shed and stored outside near other vehicles, allowing some interesting color references in the daylight.
This is a view of the vehicles side, inside the shed where it was housed . The photograhy here is misleading, tone wise, as it is made up of a patchwork of smaller photos taken from a stationary spot. This has effected the light reflected off the vehicle so the most reliable tones would be directly in front or slightly right of the photographer (away from the direct light from the shed entrance). I won't deal with my guesses on color until later in the blogg, so please be patient with this aspect. These photos are the only shot showing the right side of the vehicle clearly (as found in it's original location). The tow cables and mounts are an interesting addition as well. There is another shot of this side from a distance, after the vehicle has been dismantled and moved onto a heavy duty transport trailer.
After an unknown period of time the vehicle was 'dragged' out of the shed and stored outside near other vehicles, allowing some interesting color references in the daylight.
..............................
 An interesting shot as it is in broad daylight and has a nice comparison in tonal values to a dark yellow Hunting Tiger (which I would say has been outside a while and is definately faded to a lighter version.
......................
 A metal bar has been added along the top of the rear armour brace??
 Wasn't there when it was inside the shed.
The interior has also been cleared out, so no opportunity to identify the junk that was in there before.
Wasn't there when it was inside the shed.
The interior has also been cleared out, so no opportunity to identify the junk that was in there before.
..........................
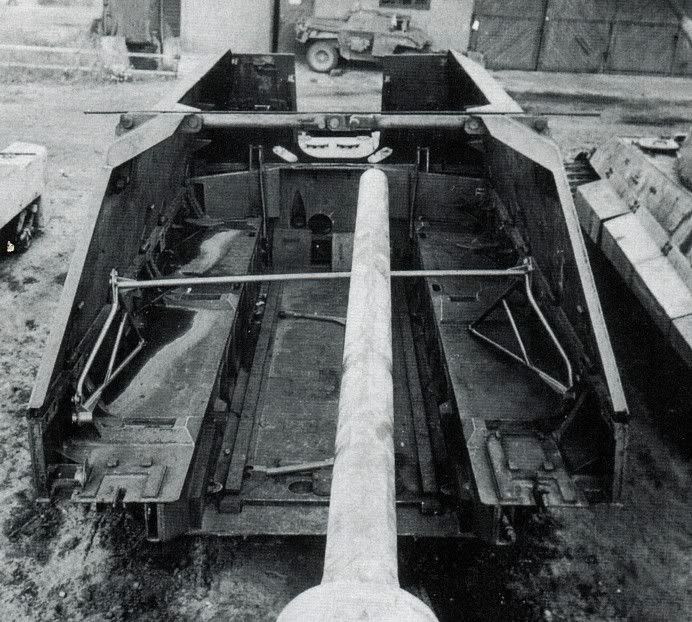
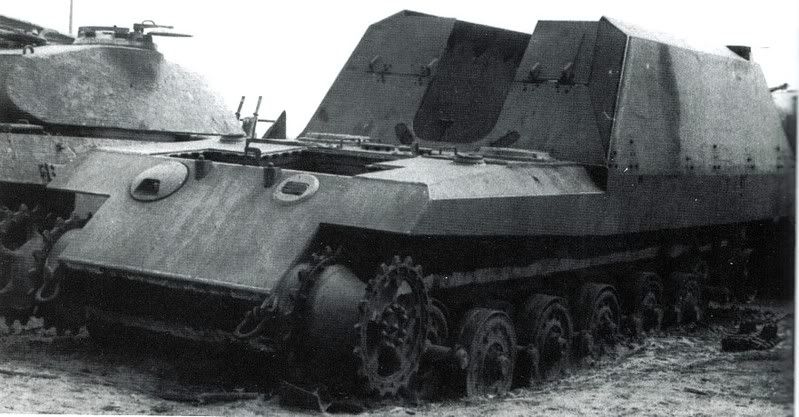 Another view from the front.
An interesting detail is the mounting plate for the drivers periscope - brand new obviously as it is a totally different tone to the front plate- could even be unpainted steel. Notice the white painted line along the chassis, probably to mark the position of torsion bar tolerance flex when fully loaded with gun and ammo etc.
The MG blister casting was original and not carried over from the KT according to my references. In 1943 the protoype work was authorised to commence and later was also directed to use carry over King Tiger parts as much as possible, which can be identified by the running gear as well as the engine deck fan covers and engine.
This vehicle is lacking the internal exhaust pipes and the external ones as well.
It has also not been fitted with the heavy duty bracing for the inner walls of the side armour, within the fighting compartment.
There are also two mounts for what seem to almost certainly be the travel lock and these appear to be in RED Primer.
Another view from the front.
An interesting detail is the mounting plate for the drivers periscope - brand new obviously as it is a totally different tone to the front plate- could even be unpainted steel. Notice the white painted line along the chassis, probably to mark the position of torsion bar tolerance flex when fully loaded with gun and ammo etc.
The MG blister casting was original and not carried over from the KT according to my references. In 1943 the protoype work was authorised to commence and later was also directed to use carry over King Tiger parts as much as possible, which can be identified by the running gear as well as the engine deck fan covers and engine.
This vehicle is lacking the internal exhaust pipes and the external ones as well.
It has also not been fitted with the heavy duty bracing for the inner walls of the side armour, within the fighting compartment.
There are also two mounts for what seem to almost certainly be the travel lock and these appear to be in RED Primer.
.....................
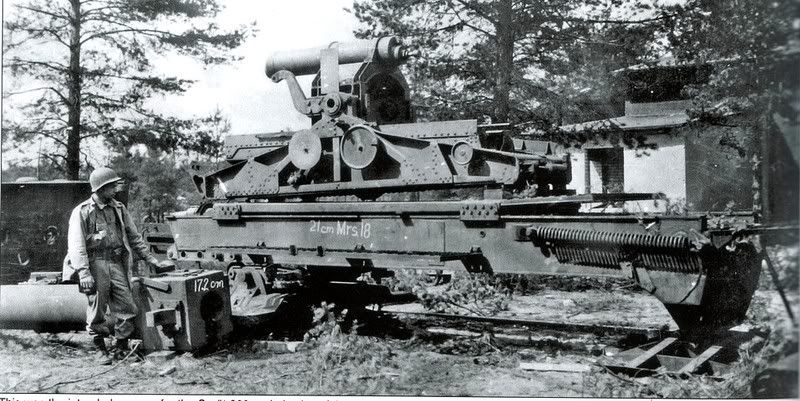
 The last known shot of the vehicle after it had been disassembled and loaded onto a German heavy transport trailor. It was supposed to be transported overseas but this was the last known official record of the vehicle - itdissappeared between here and the port.
My next dilemma was the cradle and barrel, as I do not want to waste the detail these provide, let alone the fact that they are a large piece of the model. I decided to use some artistic license with the scene and depict the storage building with a damaged roof so that the interior of the building could be viewed and have the cradle and barrel just outside next to it (to show these as well). They were actually found outside but as far as the location goes, I do not know. See photos below. Could be close and looks to bewithin the same area.
The last known shot of the vehicle after it had been disassembled and loaded onto a German heavy transport trailor. It was supposed to be transported overseas but this was the last known official record of the vehicle - itdissappeared between here and the port.
My next dilemma was the cradle and barrel, as I do not want to waste the detail these provide, let alone the fact that they are a large piece of the model. I decided to use some artistic license with the scene and depict the storage building with a damaged roof so that the interior of the building could be viewed and have the cradle and barrel just outside next to it (to show these as well). They were actually found outside but as far as the location goes, I do not know. See photos below. Could be close and looks to bewithin the same area.
..........................
 Same muzzle brake as the E-1OO.
Some interesting tones to the cradle assembly ........as well as the opportunity to add some hand written chalk markings to the model.
So having looked at these for some time I started building the beast ......................
Same muzzle brake as the E-1OO.
Some interesting tones to the cradle assembly ........as well as the opportunity to add some hand written chalk markings to the model.
So having looked at these for some time I started building the beast ......................


 plastic Nymphomaniac
")


 Threaded Mode
